Queridos New New Yorkers,
En esta tercera sesión vimos cómo se prepara la emulsión fotosensible.Este producto viene en una caja con 2 envases uno pequeño y uno grande.
- La emulsión está en el envase grande de color negro.
- El sensibilizador viene en polvo, dentro de un envase pequeño.
Primero: debemos preparar el sensibilizador; para ello le agregamos agua al envase pequeño y agitamos para mezclar bien.
Segundo: agregamos este sensibilizador preparado al envase grande donde está la emulsión.
Mezclamos bien, teniendo mucho cuidado de no formar burbujas en la mezcla. Para ellos se sugiere, luego de mezclar, dejar reposar por 2 horas esa emulsión preparada.
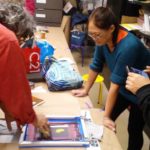
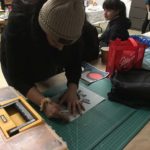
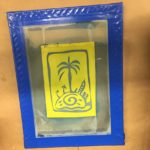
Luego, procedimos a aplicar la emulsión a las mallas serigráficas. A las mallas de color blanco: se les aplicó una capa de emulsión por ambos lados, y a las mallas de color amarillo solamente una capa por un lado.
Las dejamos secar en un cuarto oscuro que se construyó para esa clase dentro de un carrito para transportar materiales de arte. El maestro nos demostró que con ingenio y poco dinero, podemos empezar a construir nuestro taller de serigrafía en casa.
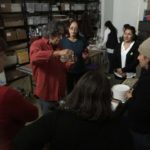
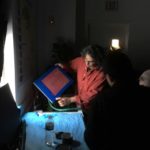
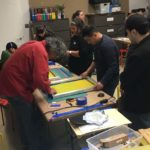
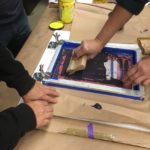
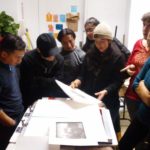
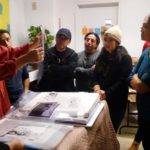
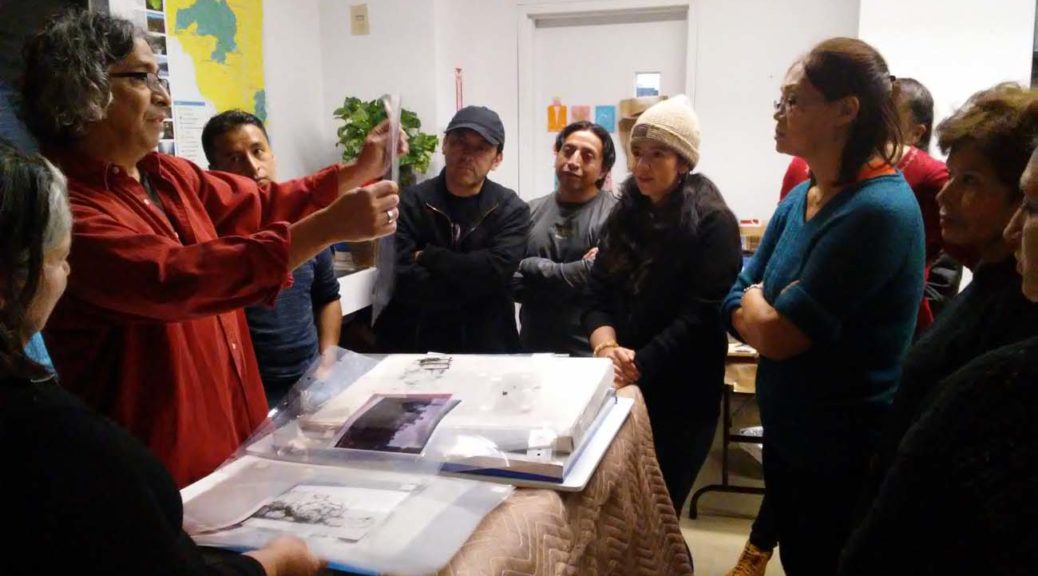
En esta clase el maestro preparó 2 estaciones diferentes de quemado de malla serigráfica A y B.
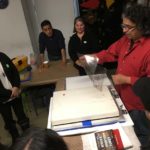
A. Tenía una lámpara de 750 watts, una distancia de 14 pulgadas entre la malla y la lámpara. A esta estación se le dieron 4 minutos de tiempo de exposición de la malla a la luz; para quemar el diseño
B. Tenía una lámpara de 500 watts, una distancia de 14 pulgadas entre la lámpara y la malla. Se le dieron 6 minutos de exposición (porque la potencia de la lámpara era menor que en A)
El maestro, hizo estas 2 estaciones, para que veamos, cómo podemos adaptarnos a los recursos que tengamos en casa, solamente variando los tiempos de exposición, ya que estábamos utilizando la misma emulsión para ambas estaciones A y B.
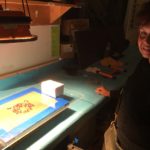
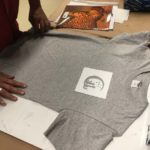
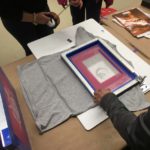
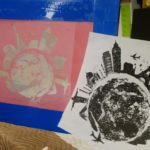
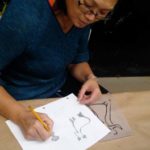
Entonces procedimos a quemar o exponer nuestros diseños en las mallas con la emulsión fotosensible.
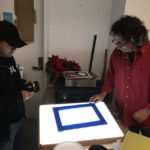
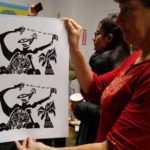
Algunos alumnos usaron el Rubilith (rojo), para hacer sus diseños, el cual da mejores resultados para quemar en la malla.
Si van a usar el Rubilith, por favor tener mucho cuidado de no cortar muy fuerte, ya que no queremos cortar todo el material, solo la superficie roja del acetato.
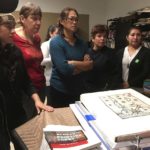
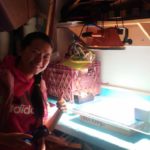
Luego de exponer las mallas a la luz en ambas estaciones, procedemos al revelado de la emulsión.
Para ello primero deberemos rociar agua con un spray suavemente por encima de la malla en ambos lados, luego esperamos unos segundos a que se humedezca la malla , para finalmente proceder a rociar agua con la manguera , teniendo cuidado de no sacar completamente la emulsión ,solo lo que deseamos que sea retirado.
Les agradecemos su buen trabajo en equipo, y positiva disposición al trabajo durante clase. Felicitaciones a todos!
Dear New New Yorkers,
In this third session we saw how the photosensitive emulsion is prepared. This product comes in a box with 2 containers, one small and one large.
- The emulsion is in the large black container.
- The sensitizer comes in powder form, inside a small container.
First: we must prepare the sensitizer; for this we add water to the small container and shake to mix well.
Second: add this prepared sensitizer to the large container where the emulsion is.
Mix well, being very careful not to form bubbles in the mixture. For them it is suggested, after mixing, to leave this prepared emulsion for 2 hours.
Then, we proceeded to apply the emulsion to the screen meshes. To the white meshes: an emulsion layer was applied on both sides, and on the yellow meshes only one layer on one side.
We let them dry in a dark room that was built for that class inside a cart to transport art materials. The teacher showed us that with ingenuity and little money, we can start building our screen printing workshop at home.
In this class, the teacher prepared 2 different burning stations of screen mesh A and B.
A. We had a 750 watt lamp, a distance of 14 between the mesh and the lamp. This station was given 4 minutes of exposure time of the mesh to light; to burn the design.
B. We had a 500 watt lamp, a distance of 14 “between the lamp and the mesh, and was given 6 minutes of exposure (because the power of the lamp was less than in A).
The teacher did these 2 stations, so we can see how we can adapt to the resources we have at home, only varying the exposure times, since we were using the same emulsion for both stations A and B.
Then we proceeded to burn or expose our designs in the meshes with the photosensitive emulsion. Some students used the Rubilith (red), to make their designs, which gives better results to burn in the mesh.
If you are going to use the Rubilith, please be very careful not to cut too hard, since we do not want to cut all the material, just the red surface of the acetate.
After exposing the meshes to the light in both seasons, we proceed to the development of the emulsion.
To do this first we spray water with a spray on top of the mesh on both sides, then wait a few seconds to wet the mesh, to finally proceed to spray water with the hose, taking care not to remove the emulsion completely, just what we want to be removed.
We thank you for your good teamwork and positive disposition to work during class. Congratulations to all!