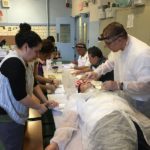
En la cuarta sesión de nuestro curso de escultura básica, empezamos aplicando un sellador no toxico a nuestras piezas de yeso, vaciadas en clases anteriores.
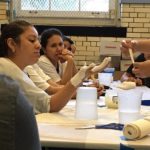
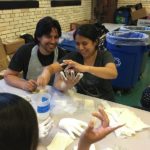
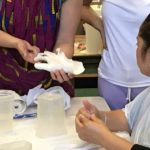
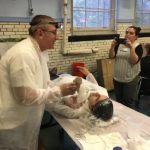
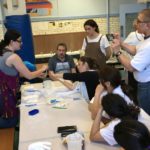
Luego, la maestra Liene nos hizo una introducción a cerca de la nueva técnica que usaremos en esta sesión: gasa enyesada. Hoy la usaremos para hacer los moldes de partes de nuestro cuerpo .
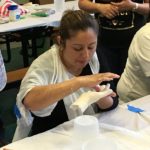
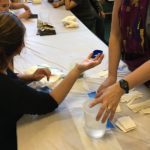
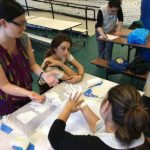
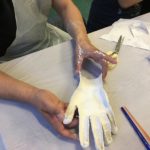
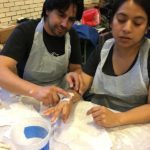
Primero cortamos la gaza enyesada en tiras pequeñas 2 x 3 cm. y mediadas 3×5 cm. Luego aplicaremos Vaselina en la piel que deseamos sacar molde. La Vaselina servirá para ayudarnos a desmoldar fácilmente y a proteger nuestra piel y bellos de nuestro cuerpo.
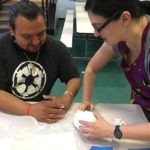
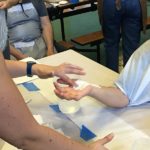
Debemos tener cuidado con las tiras de gasa enyesada que ya hemos cortado, ya que una vez que le caiga agua, empezara a endurecer.
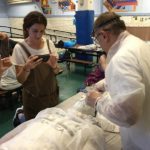
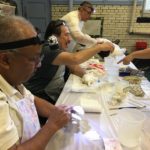
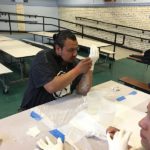
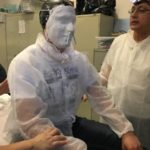
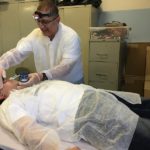
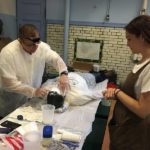
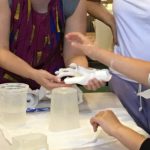
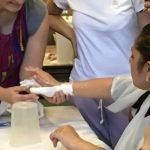
Entonces, procedemos a sumergir brevemente toda la tira de gaza enyesada en un recipiente de plástico con agua, sin dejarla caer. Luego la ponemos sobre la piel y con los dedos empezamos a sobar para que el yeso se active y llene todos los huecos de la gaza en su totalidad. Poco a poco iremos formando una capa de tiras de gaza.
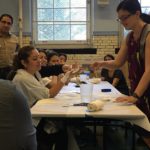
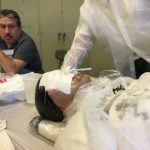
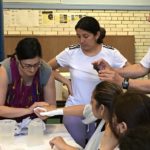
Esta primera capa podremos irla reforzando aplicando otra capa de tiras de gaza enyesada pero esta segunda capa, estará en la dirección contraria que la primera.
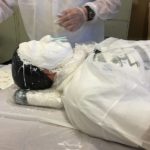
Dejamos secar por unos 5 minutos, y sentiremos que la gaza empieza a está un poco tibia, e ese momento es buen tiempo para retirar el molde con mucho cuidado.
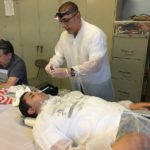
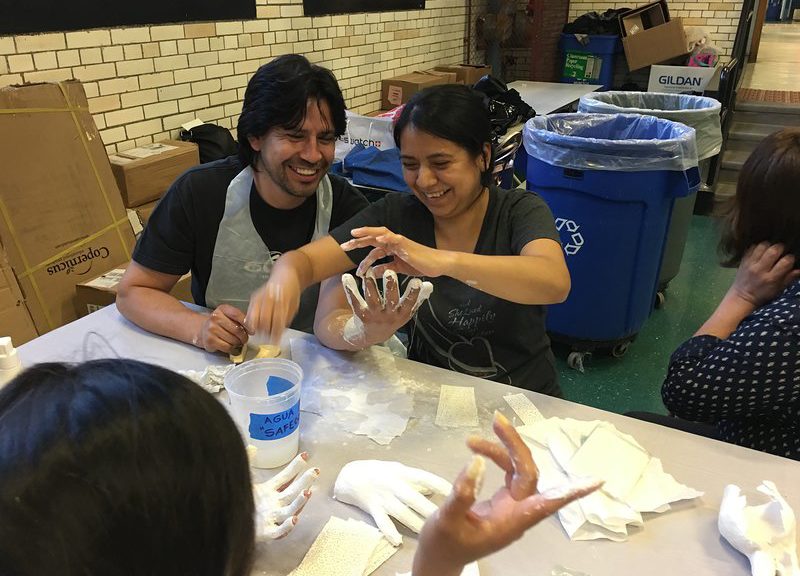
Es así como terminamos de hacer moldes usando gaza enyesada, pero en esta ocasión, usamos partes de nuestro cuerpo para hacer los moldes.
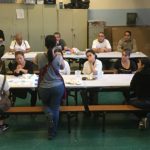
Felicitaciones a todos por el gran trabajo en equipo demostrado en cada sesión y por el ambiente de cordialidad generado en cada clase.
In the fourth session of our basic sculpture course, we started by applying a non-toxic sealant to our plaster pieces, emptied in previous classes. Then, teacher Liene gave us an introduction to the new technique that we will use in this session: plaster bandages. Today we’ll use it to make the molds of parts of our body.
First cut the plaster bandages in small strips 2 x 3 cm. and mediated 3×5 cm. Then we apply Vaseline on the skin that we want to remove our mold. The Vaseline will serve to help us easily unmold and protect our skin and beauty from our body.
We must be careful with the strips of plaster we have already cut, since once waterfalls, it will begin to harden.
Then, we proceed to briefly submerge the entire strip of plaster bandages in a plastic container with water, without dropping it. Then we put it on the skin and with our fingers, we begin to rub so that the plaster fills all the holes in the plaster bandages completely. Little by little, we will form a layer of plaster bandage strips.
This first layer can be reinforced by applying another layer of strips of plaster bandages but this second layer will be in the opposite direction than the first. Let it dry for about 5 minutes, and we will feel that the plaster bandages start to get a little warm, and that moment is a good time to remove the mold with great care.
This is how we end up making molds using plaster bandages, but this time, we use parts of our body to make the molds.
Congratulations to all for the great teamwork shown in each session and for the atmosphere of cordiality generated in each class.