
En esta sesión del Taller de Artes y Oficios, finalmente avanzamos con la siguiente unidad:
“Bordado sobre Arpillera” utilizando agujas de plástico e hilo (Lana). Nuestra Artista docente trajo una muestra. En esta muestra los participantes vieron de cerca 4 puntadas básicas de bordado:
Puntada de contorno o de tallo, puntada de cadeneta, puntada de raso y puntada de manta. También se repartió (con otras puntadas más avanzadas: Puntada de hoja, puntada de espina de pescado y puntada de relleno), se repartió como referencia para practicar en casa.
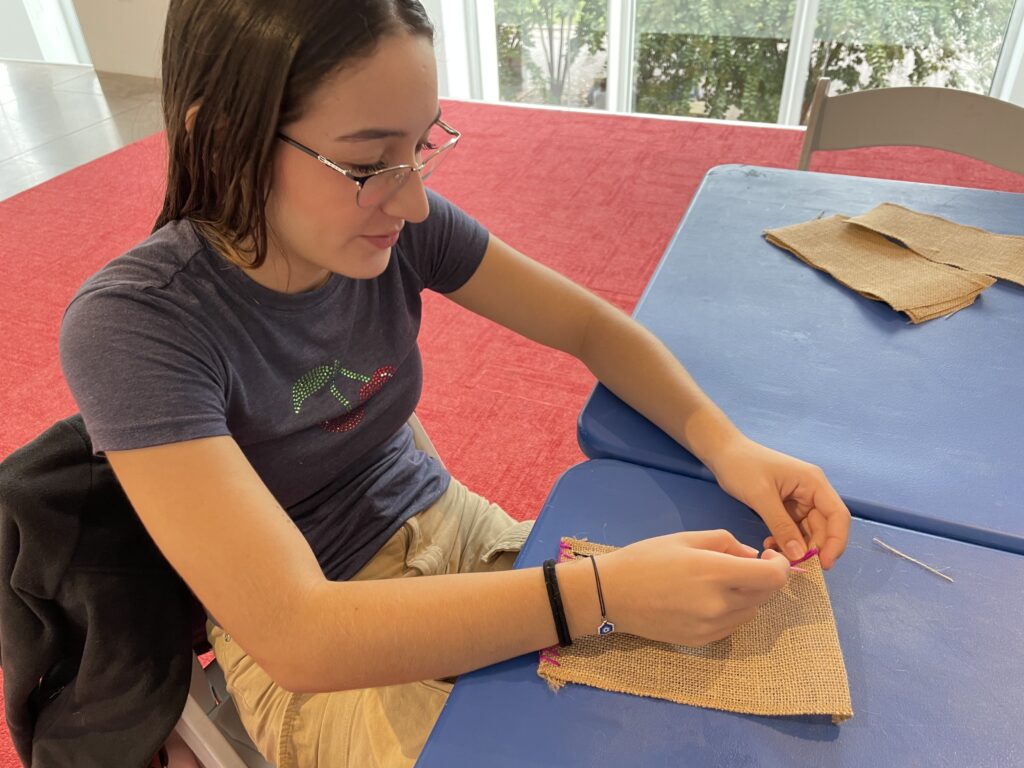
Al comenzar el proceso, cada participante tenía un trozo de tela de arpillera, hilo y una aguja, para para empezar a coser el dobladillo utilizando la puntada de manta. Algunas personas querían hacer una variación de la misma\ que se llama Puntada de Manta Cerrada que forma una “V” a lo largo del borde de la\ de la tela. La puntada de manta se suele utilizar para evitar que se deshilache.
A continuación, procedemos a trazar la imagen a bordar. Para este paso utilizamos plantillas. Y Finalmente, empezamos a perfilar la imagen utilizando la puntada de contorno o de tallo. Todos los participantes llegaron participantes llegaron con éxito a este paso, por lo que pudimos avanzar para rellenar las áreas grandes utilizando la puntada de cadeneta o la puntada de raso. o la puntada de raso. El facilitador artístico sugirió que se rellenaran las áreas grandes con la puntada de cadeneta y las pequeñas con la puntada de raso. de cadena y las áreas pequeñas con la puntada de satén. Mientras la gente bordaba, hablamos de la importancia de estos paneles cosidos a mano de los paneles cosidos a mano llamados “Arpilleras”, que empoderaron y dieron voz a las mujeres en Chile durante la
dictadura de Pinochet.
Casi todo el mundo terminó sus paneles rellenando las áreas pequeñas y grandes. Para la próxima clase vamos a añadir detalles utilizando puntadas más avanzadas. Esa clase será la última de la
serie Taller de Artes y Oficios.
Texto: Michelle Melo, educadora y artista.


EMBROIDERY ON BURLAP – October 26th, 2022.
Artist educator: Michelle Melo
(Blog Entry)
In this session of the Arts and Crafts Workshop, Finally we moved forward with the next unit:
“Embroidery on Burlap” using plastic needles and yarn (Wool). Our teaching Artist brought a sample. In this sample the participants took a closer look at 4 basic embroidery stitches:
Outline or Stem Stitch, Chain Stitch, Satin Stitch, and Blanket Stitch. Also, a handout (with other more advanced stitches: Leaf Stitch, Fishbone Stitch, and Fill Stitch), was given out as a reference to practice at home.
As we started the process, every participant had a piece of burlap fabric, yarn, and a needle, to start stitching the hem using the Blanket Stitch. Some people wanted to do a variation of it which is called the Closed Blanket Stitch that forms a “V” shape throughout the edge of the fabric. The Blanket Stitch is commonly used to avoid fraying.
Then we proceed to trace the image to be embroidered. For this step we used stencils. And finally, we started to outline the image using the Outline or Stem Stitch. Every participant got successfully to this step so we could advance to fill out the big areas using either the Chain Stitch or the Satin Stitch. It was suggested by the Artist Facilitator to fill out the big areas using the Chain Stitch and the small areas using the Satin Stitch.
While people were embroidering, we talked about the importance of this hand stitched panels called “Arpilleras”, which empowered and gave voice to women in Chile during the Pinochet
Dictatorship.
Almost everybody finished their panels filling out the small and big areas. For the next class, we are going to add details using more advanced stitches. That class will be the last one of the series Arts and Crafts Workshop.